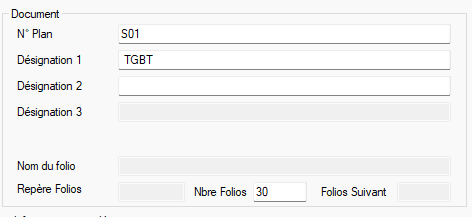
Goal:
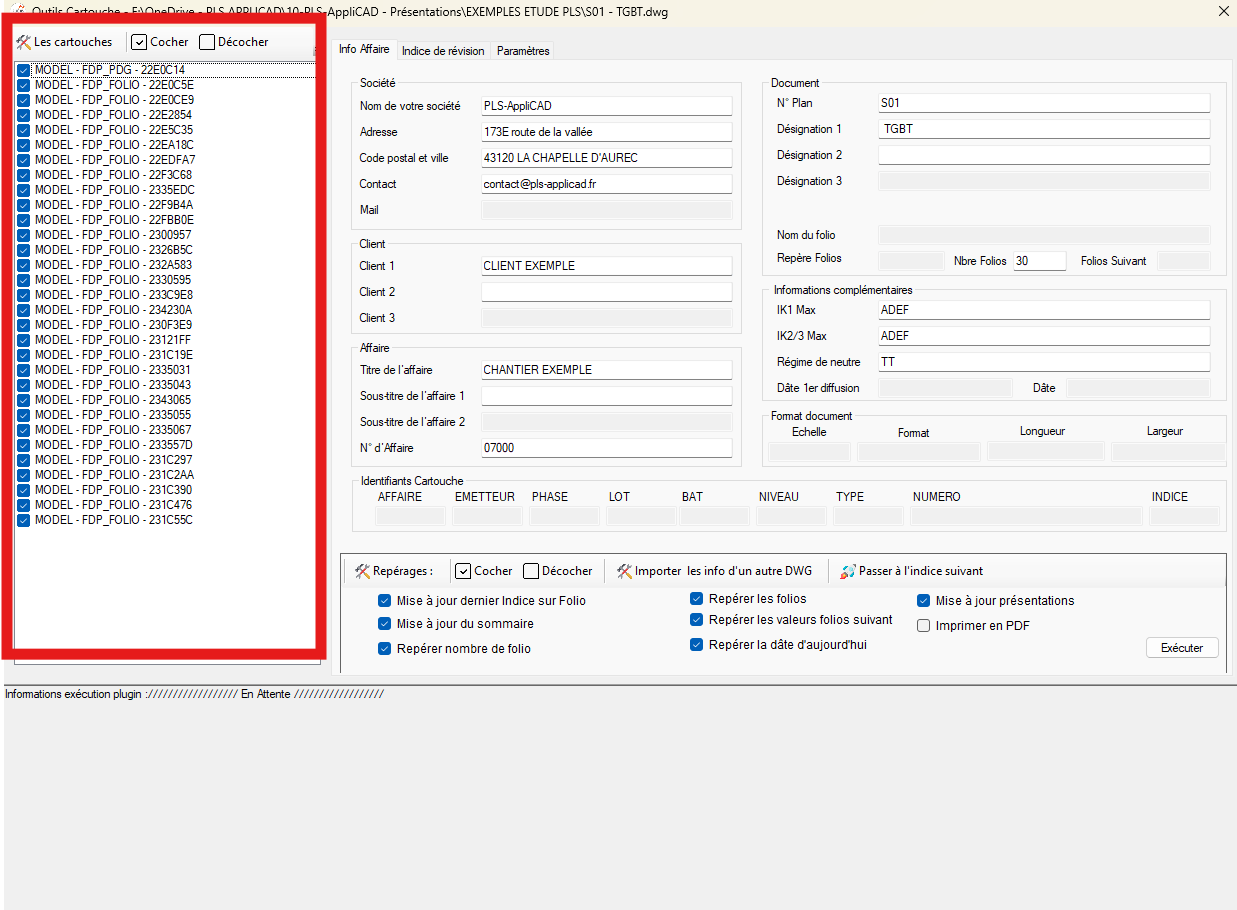
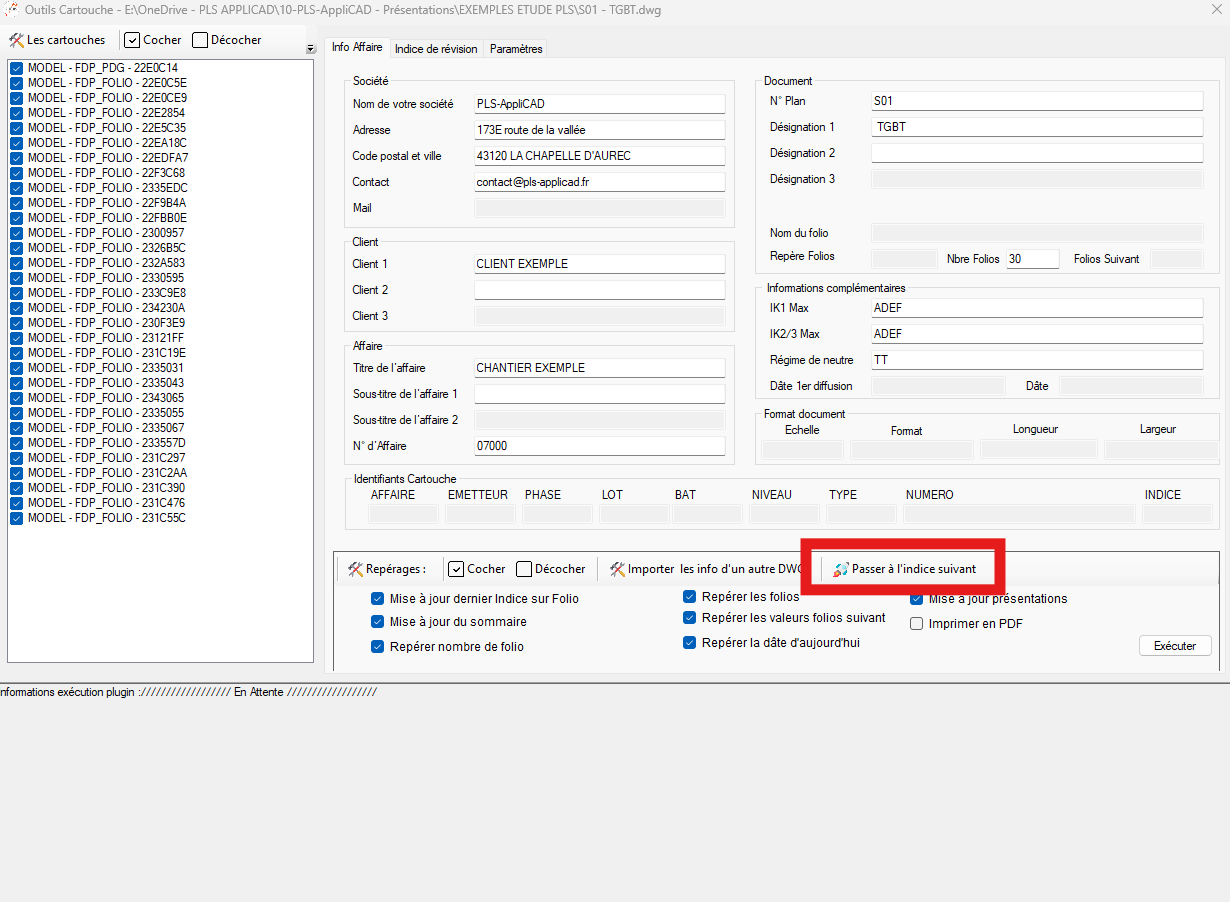
Open the document to edit title-block information
It reads the attributes present in your title blocks, displays them, lets you edit them, then automatically writes the new values back into the DWG (on the checked title blocks).
It can also renumber sheets, update indices, generate layouts, and more.
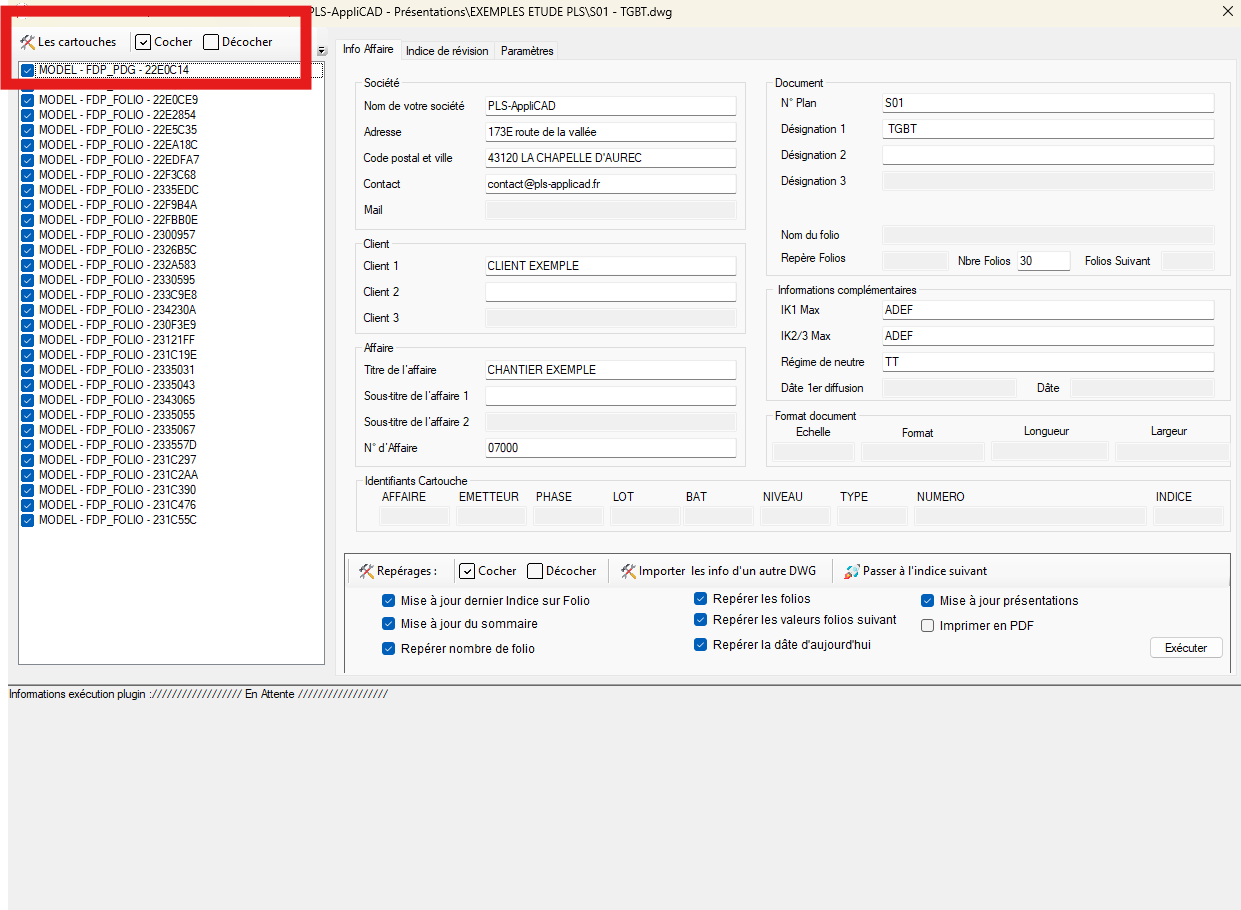
List “Title blocks”
Left column: the list contains all detected title-block blocks in the DWG (Model space and possibly Paper space).
Check one or more items to indicate which title blocks will be read/written.
Select the title blocks to modify. Check / Uncheck the entire list
The “Check” / “Uncheck” buttons let you select or deselect everything.
Handy before a global operation (numbering, indices, creating layouts…).One click to prepare a global operation. General principle: direct read / write
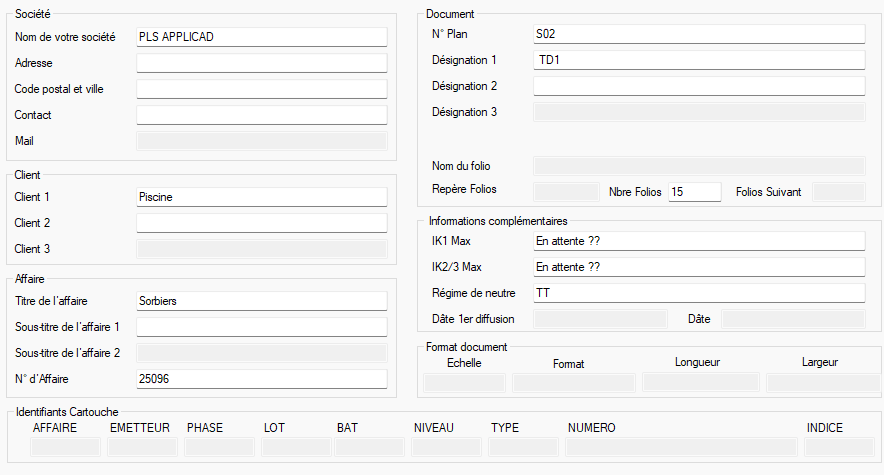
As soon as you edit a field in the form, the value is written to the corresponding attribute of each checked title block.
Conversely, on load, the fields are filled by reading attributes from the DWG.Editing a field = updating the title block in the DWG. Value “*” = different values
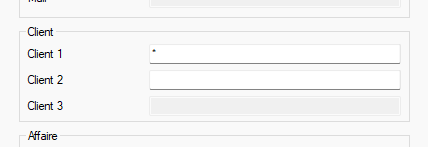
If multiple checked title blocks have different values for the same field, that field shows “*”.
This means values are heterogeneous.
If you type a new value, it will replace all old values on all checked title blocks.The “*” symbol indicates non-uniform values. Cell colors
White areas = editable (values will be written back to the DWG).
Greyed areas = locked (no corresponding attribute found in your DWG).White = editable, Grey = locked. “Tagging” bar (bottom of the tab)
This area groups automatic action checkboxes for the checked title blocks.
They are only executed when you click “Run”.
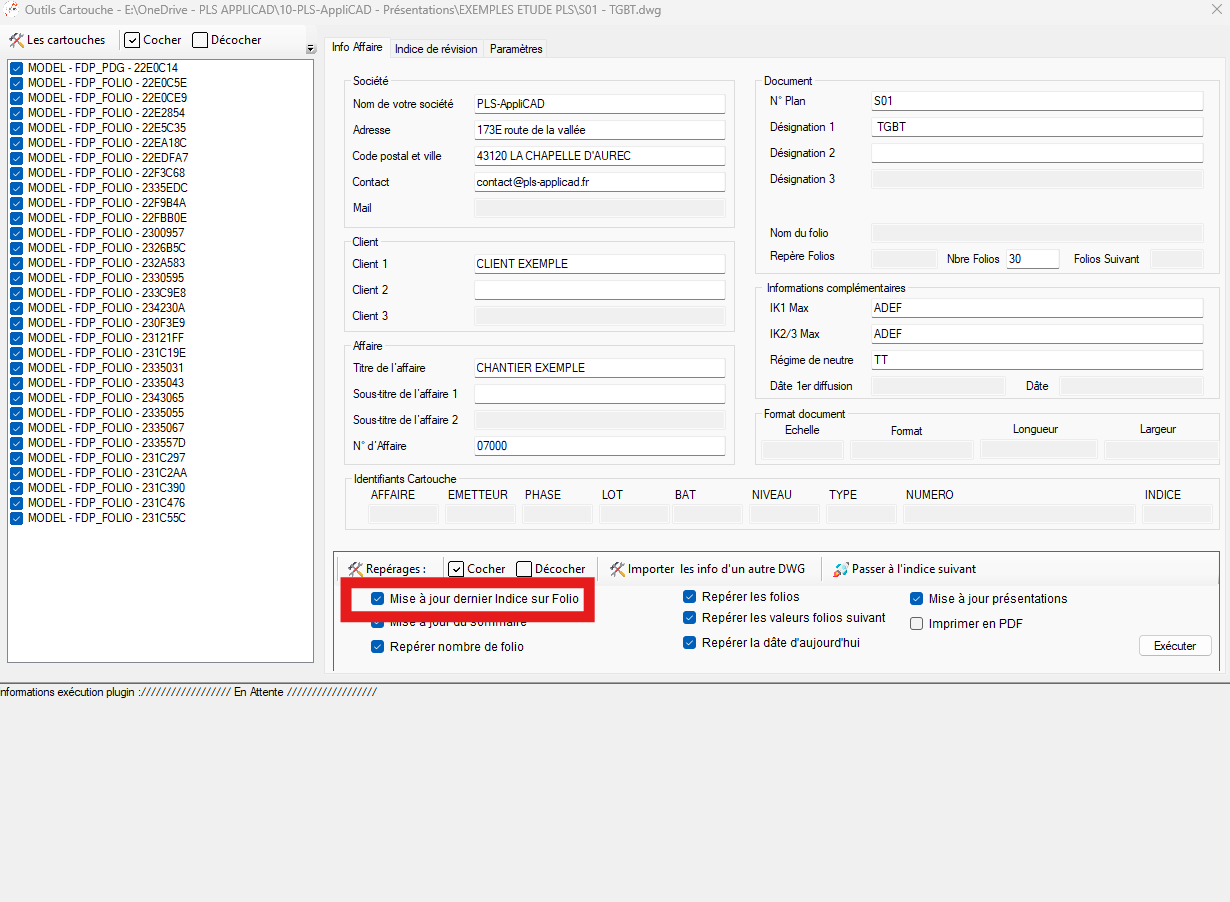
This is where all project helper functions live.Automation area for sheets, indices, etc. Update latest index on sheet
Analyzes the A…L history, retrieves the last actually used index,
and writes it into the INDICE field of all sheets.Automatic index refresh. Tag sheets
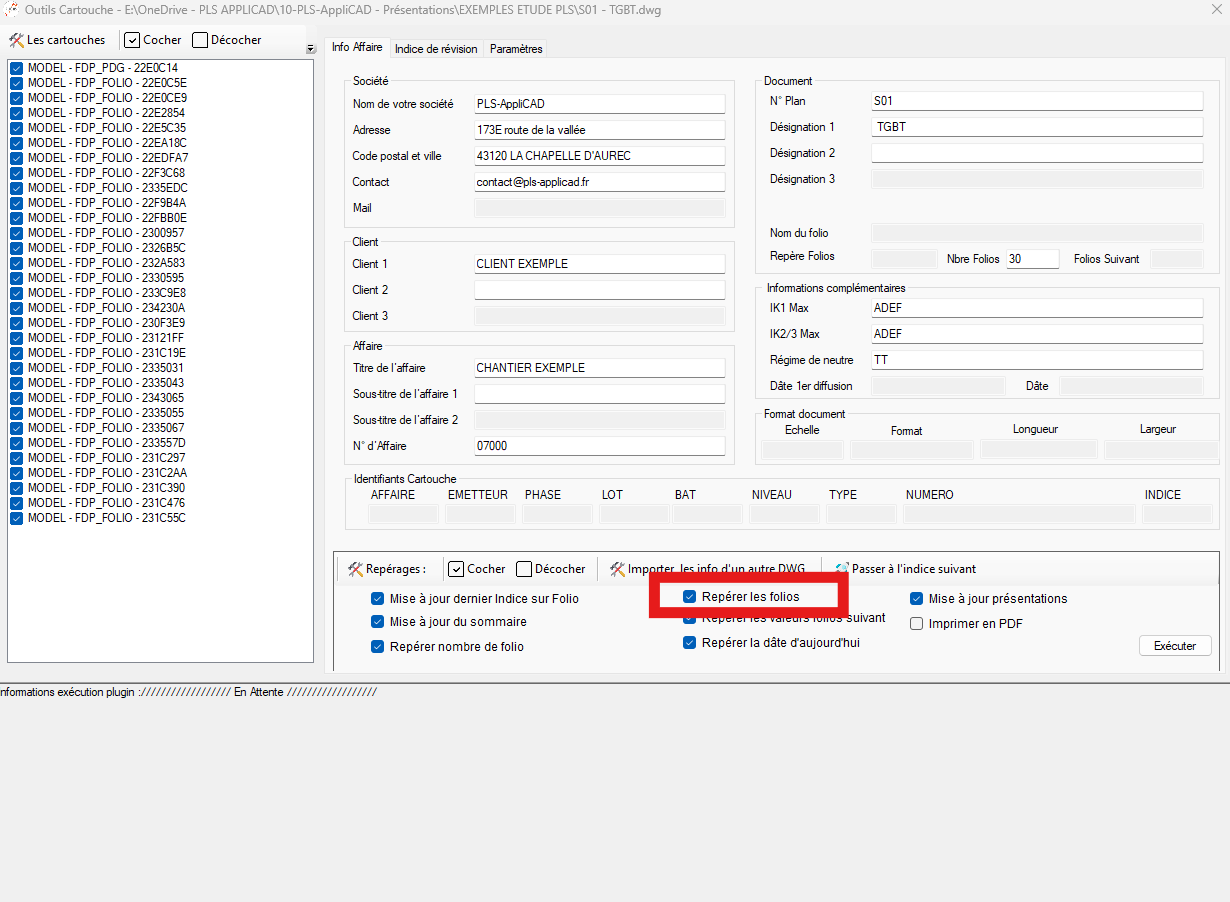
Assigns a sequential sheet number to each title block (1, 2, 3, …)
according to the list order.
Ideal for cleanly renumbering a project set.Sequential sheet numbering. Tag table of contents
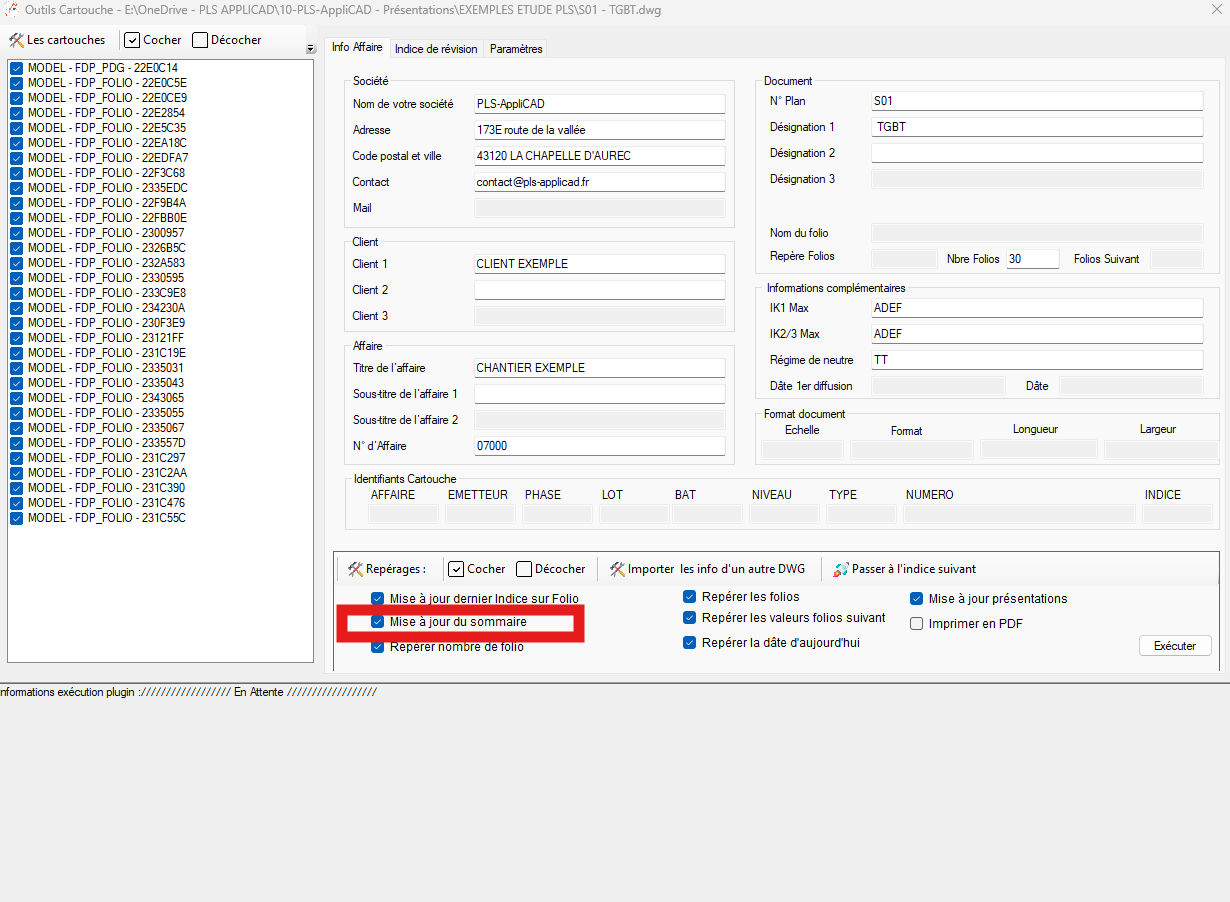
Finds the software-specific summary block, then fills it.
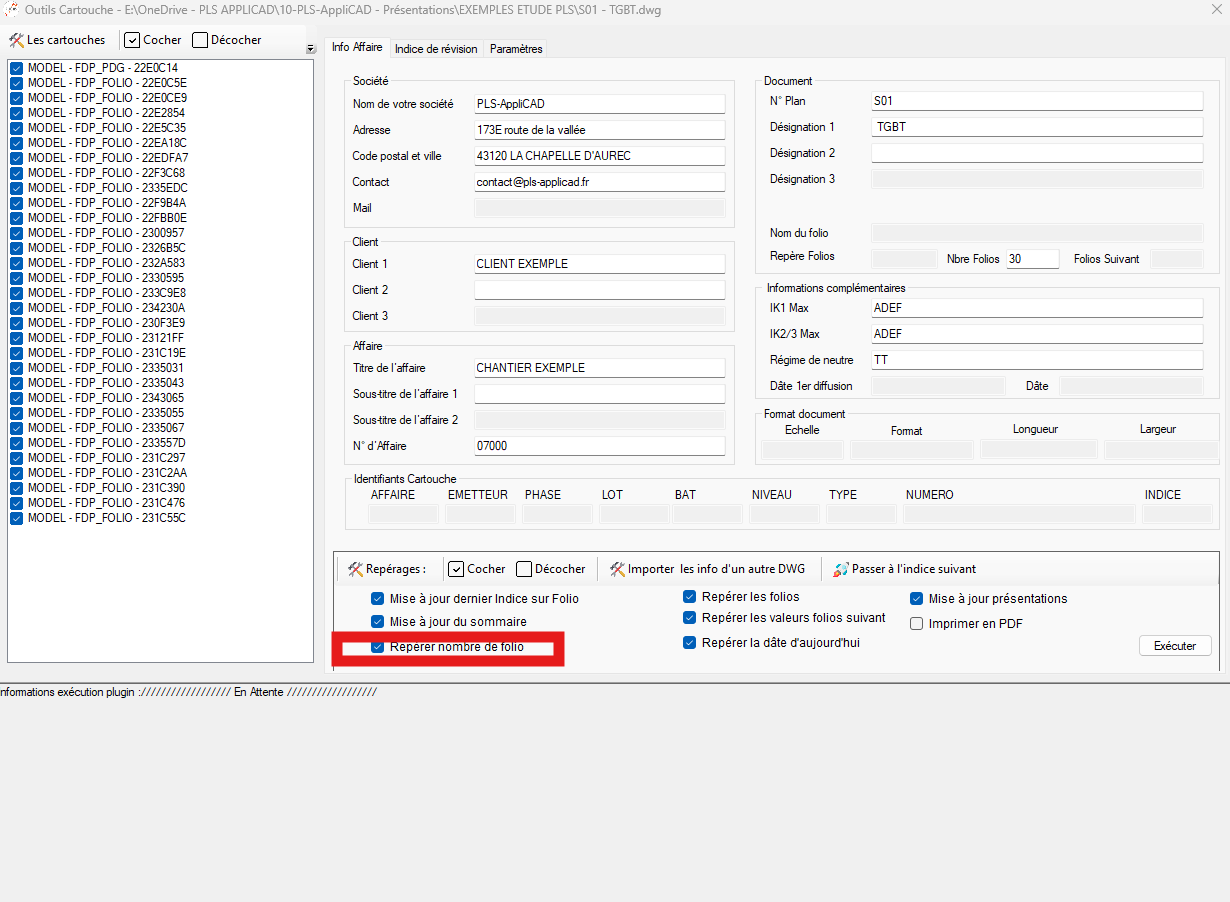
The summary block is available in the template DWG.Summary updated automatically. Tag number of sheets
Analyzes the number of sheets present in Model space of your DWG
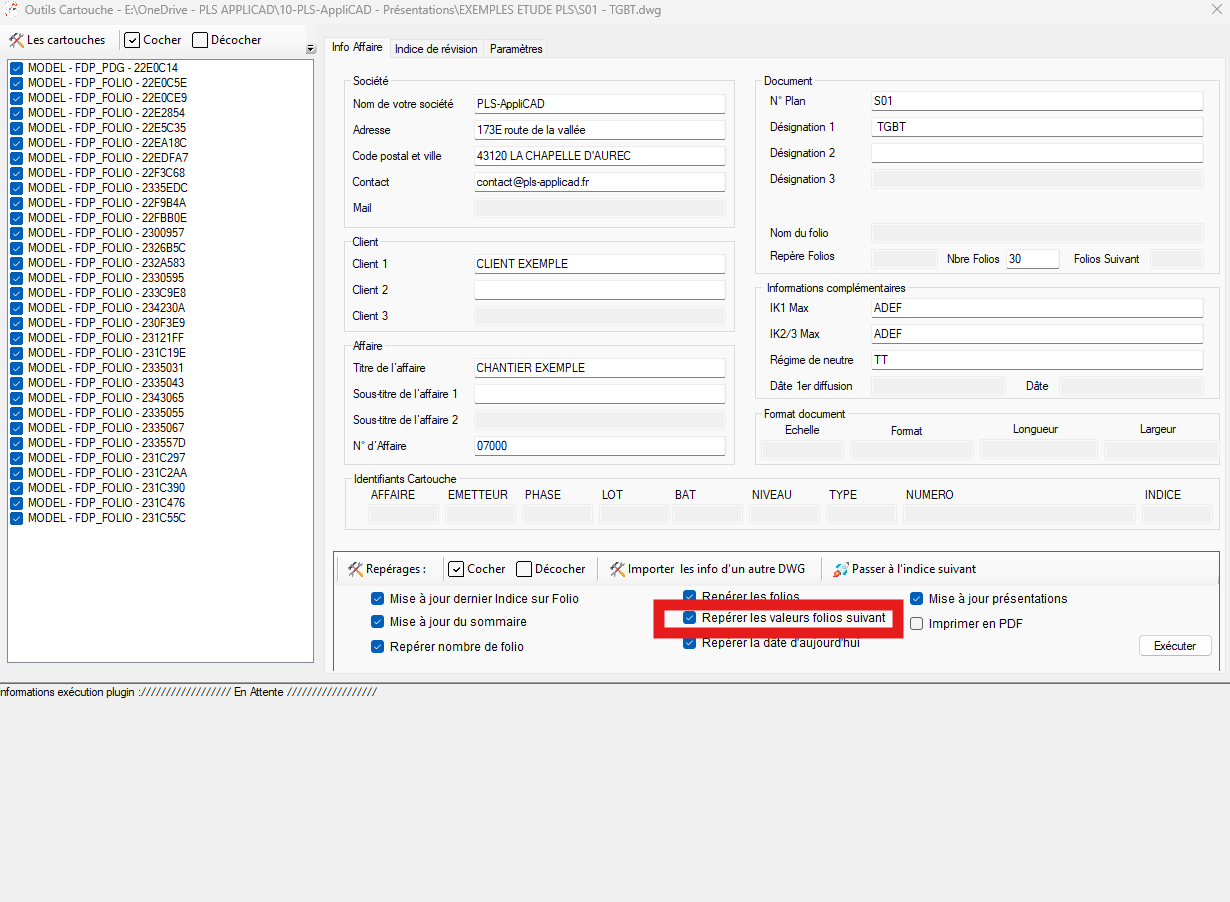
and fills the “No. of Sheets” field.Automatic tally of the total number of sheets. Tag “Next sheet” value
For each sheet, finds the next sheet
and fills the “Next sheet” field.Automatic sheet → next sheet linkage. Today’s date
Fills the current date (format 01/01/25) on all checked sheets.
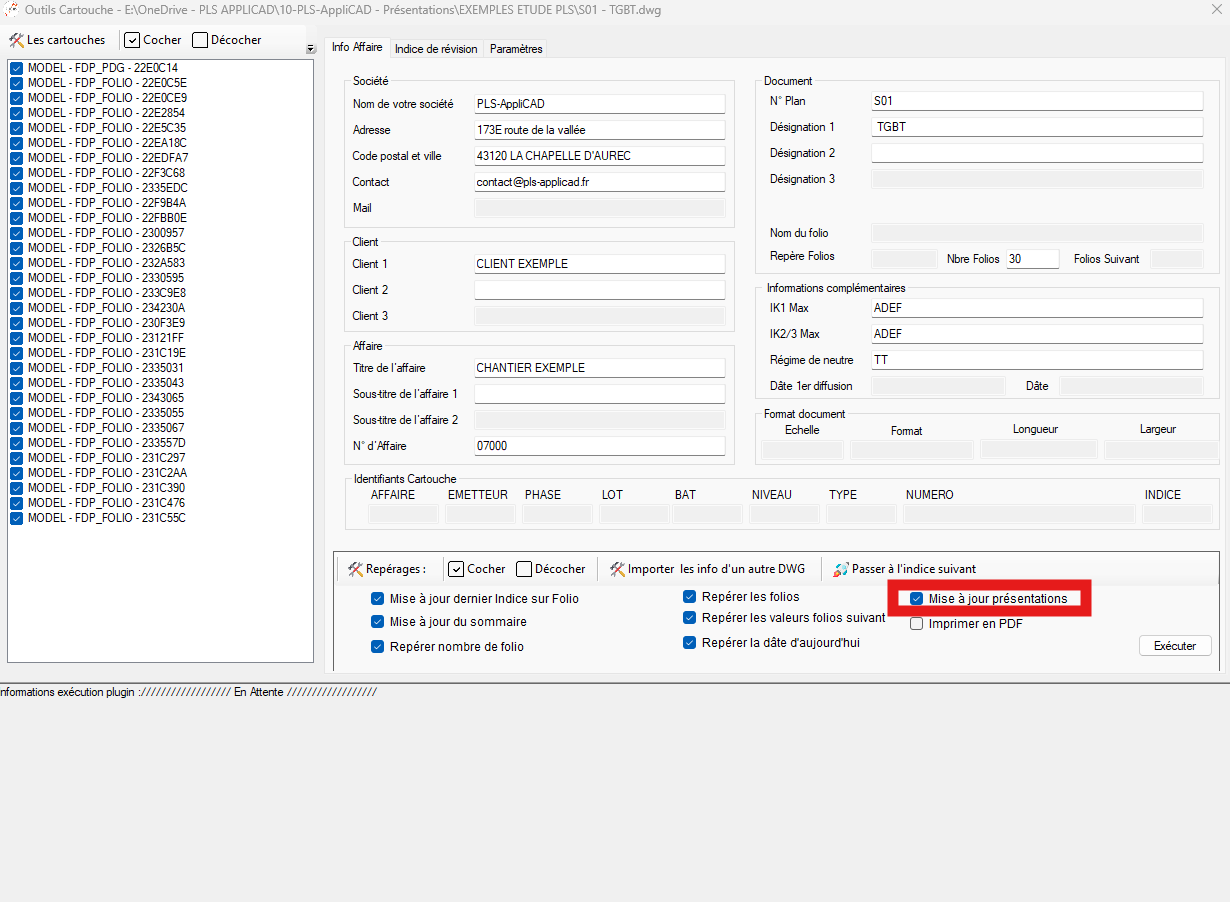
Date updated on all title blocks. Update layouts
Automatically creates layouts from blocks in Model space
(not from Paper space).
The software imports a preconfigured landscape or portrait layout for each block,
zooms, adjusts according to the percentage defined in “Settings,” then moves to the next sheet.
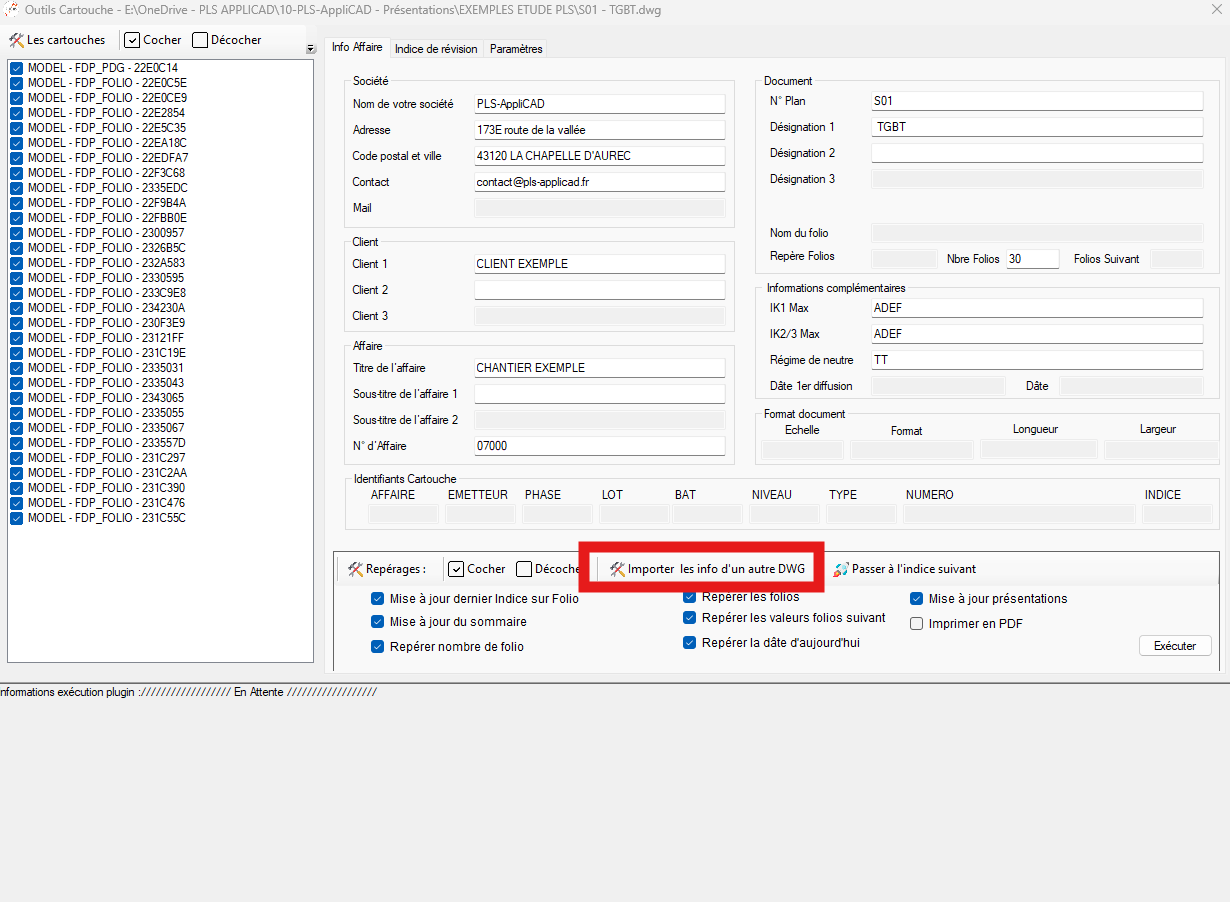
This lets you recreate all layouts quickly.Automatic layout generation for each sheet. Import info from another DWG
Opens a reference DWG, reads its title blocks, and offers to copy its values
into your own title blocks.Automatically pull info from another project. Advance to the next index
Launches the index-change wizard.
A window opens to define the new index,
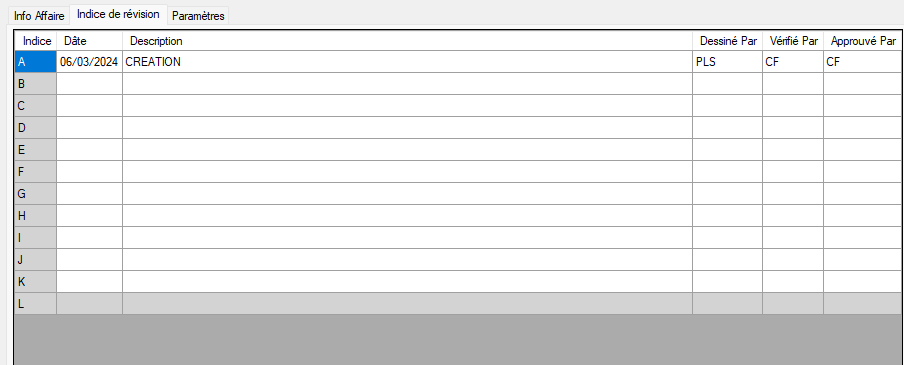
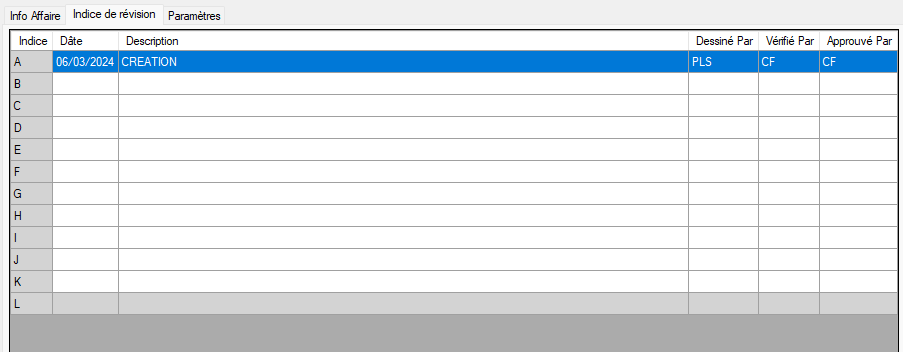
then the process runs for all title blocks.Global update of the revision index. “Revision index” grid (A → L)
A 12-row table (A → L) with columns:
Index, Date, Description, Drawn by, Checked by, Approved by.
Editing a cell updates the associated attributes of the checked title block.Directly editable revision history. Keyboard shortcuts in the grid
Ctrl+C / Ctrl+V / Ctrl+X to copy / paste / cut.
Delete to clear cell values.
Ctrl+A to select all.
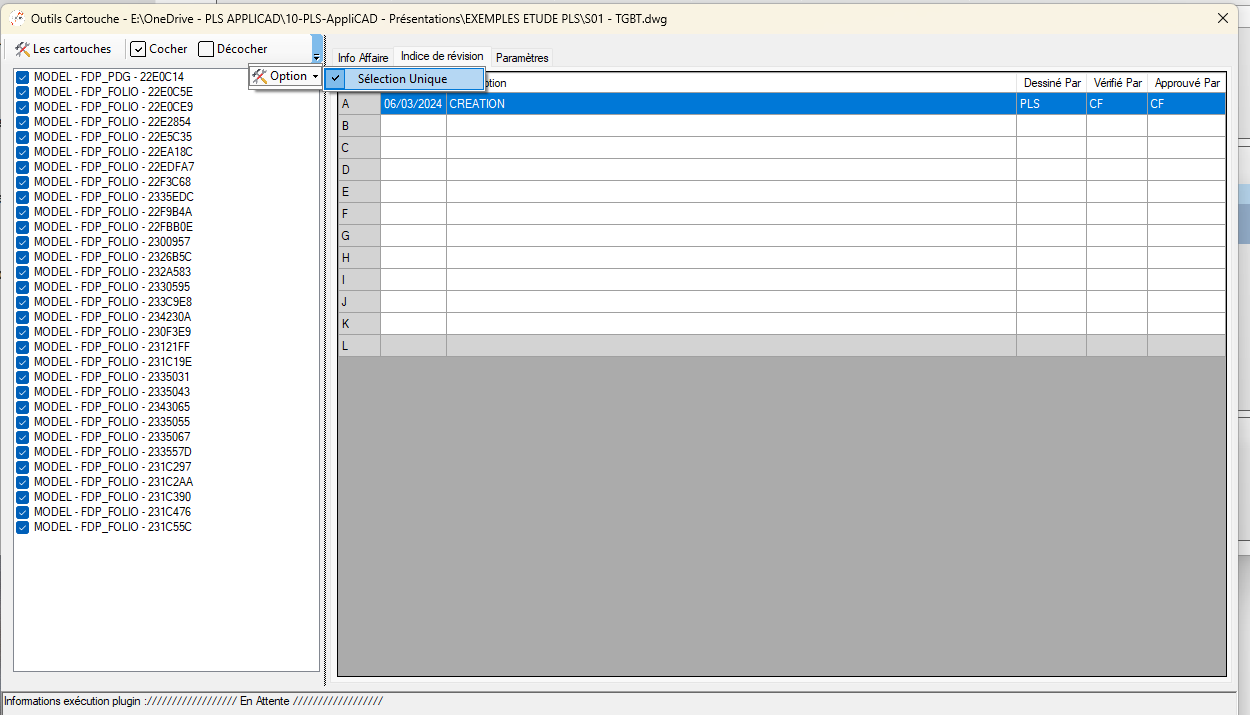
Perfect for quickly updating multiple rows.Productivity: fast bulk editing. Single-selection mode
If enabled, checking one title block automatically unchecks all others.
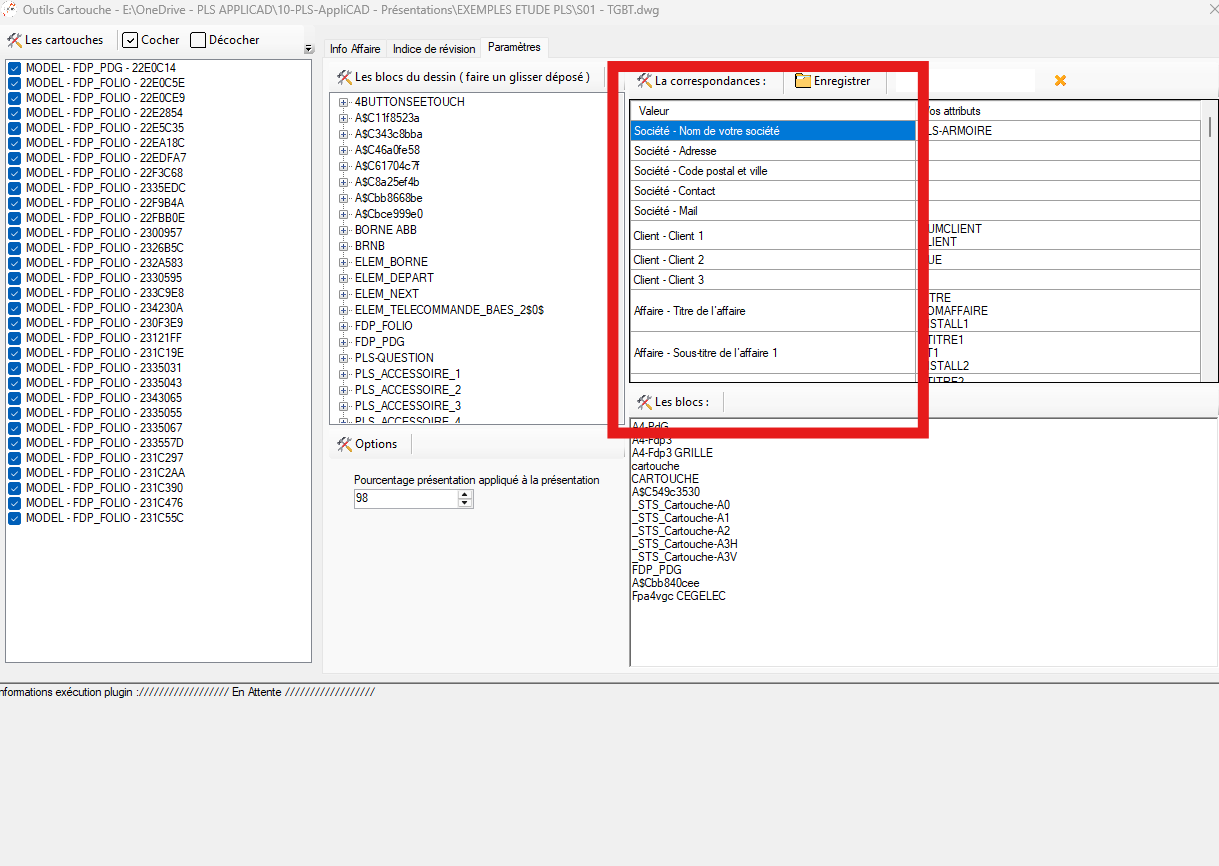
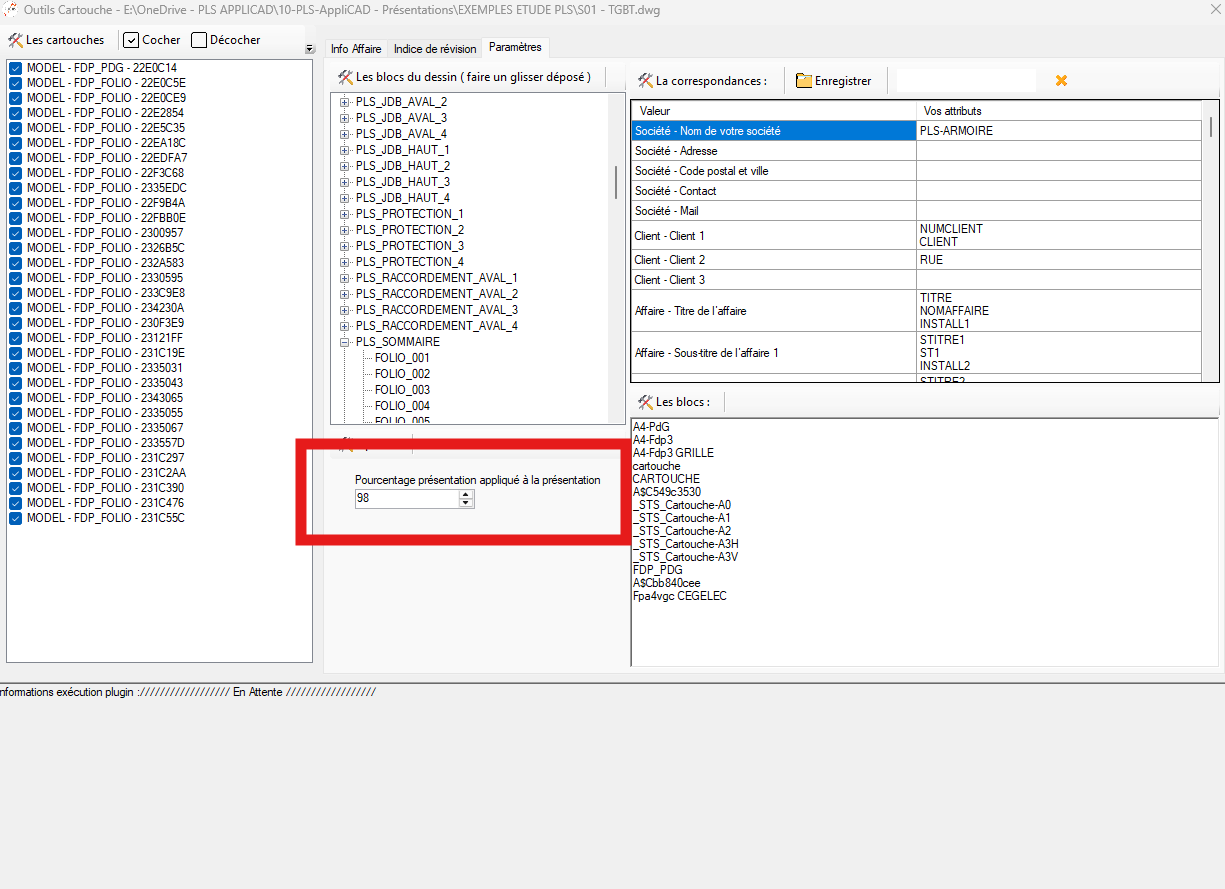
Very useful for validating sheet by sheet, seeing the immediate read/write effect.Sheet-by-sheet control with confidence. “Settings” tab → Drawing blocks
You can see the list of blocks and their attributes in a tree view.
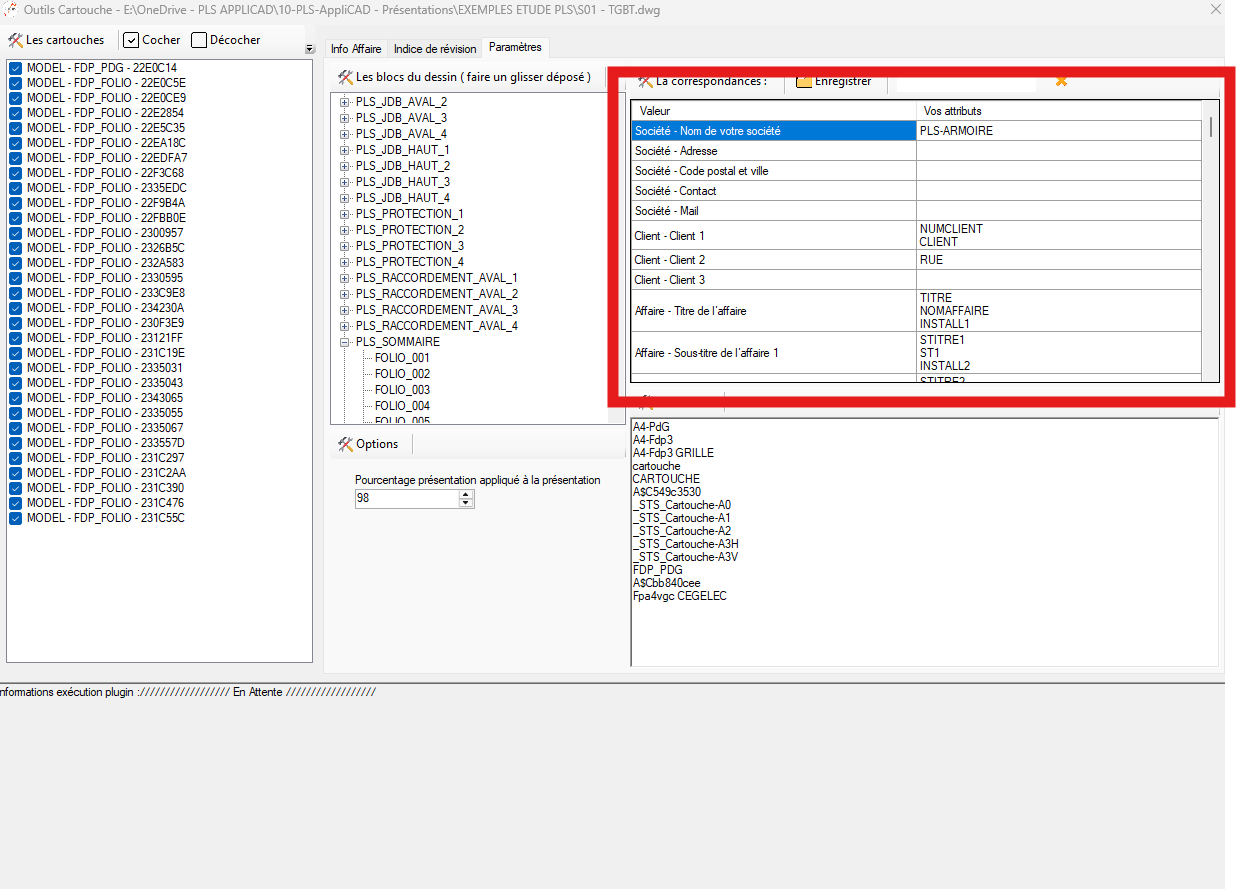
The “Value” column corresponds to the fields you can complete in “Job Info.”Full view of the drawing’s blocks and their attributes. Drag and drop an attribute into the mapping table
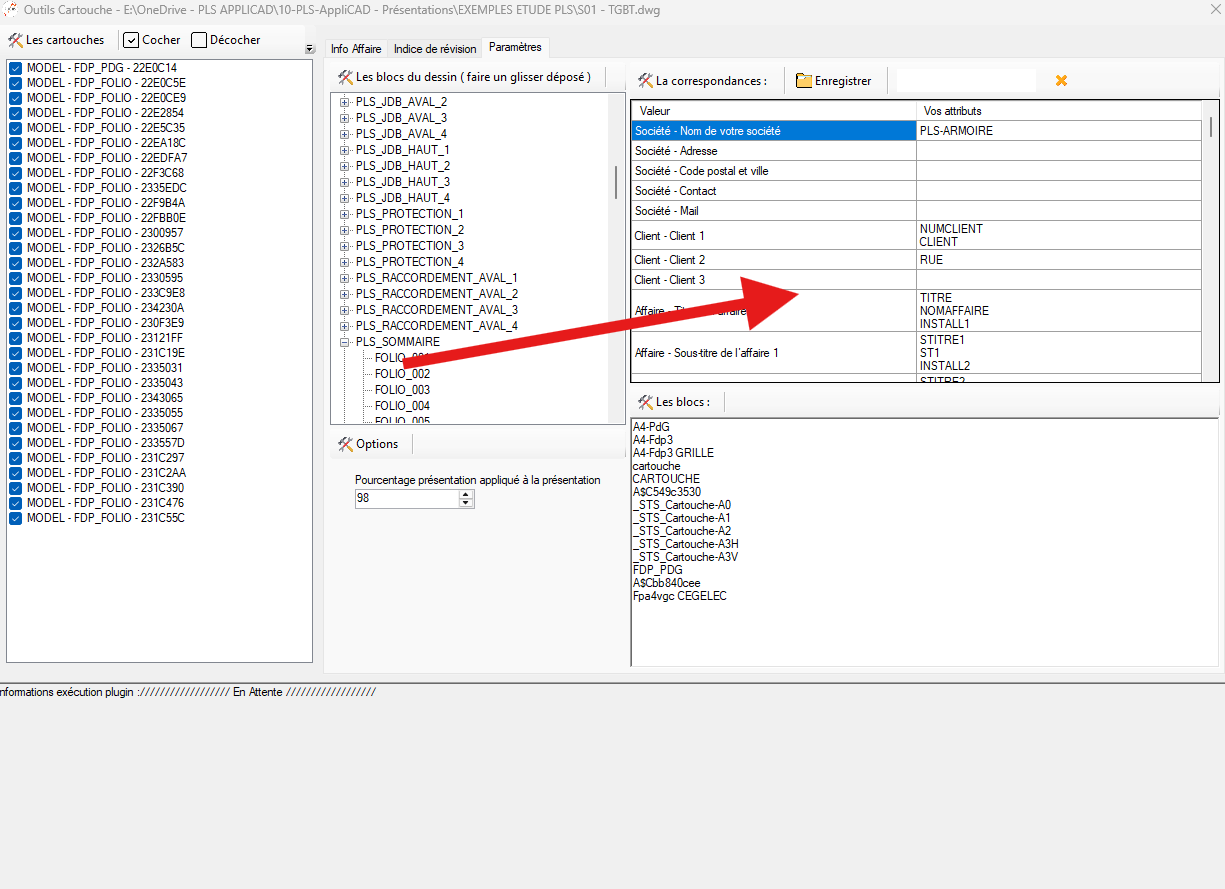
Drag an attribute from the list to add it to the mapping table.
Then, the software will know which field to write when you edit that field.Automatic mapping between form field ⇄ DWG attribute. Which blocks are considered title blocks
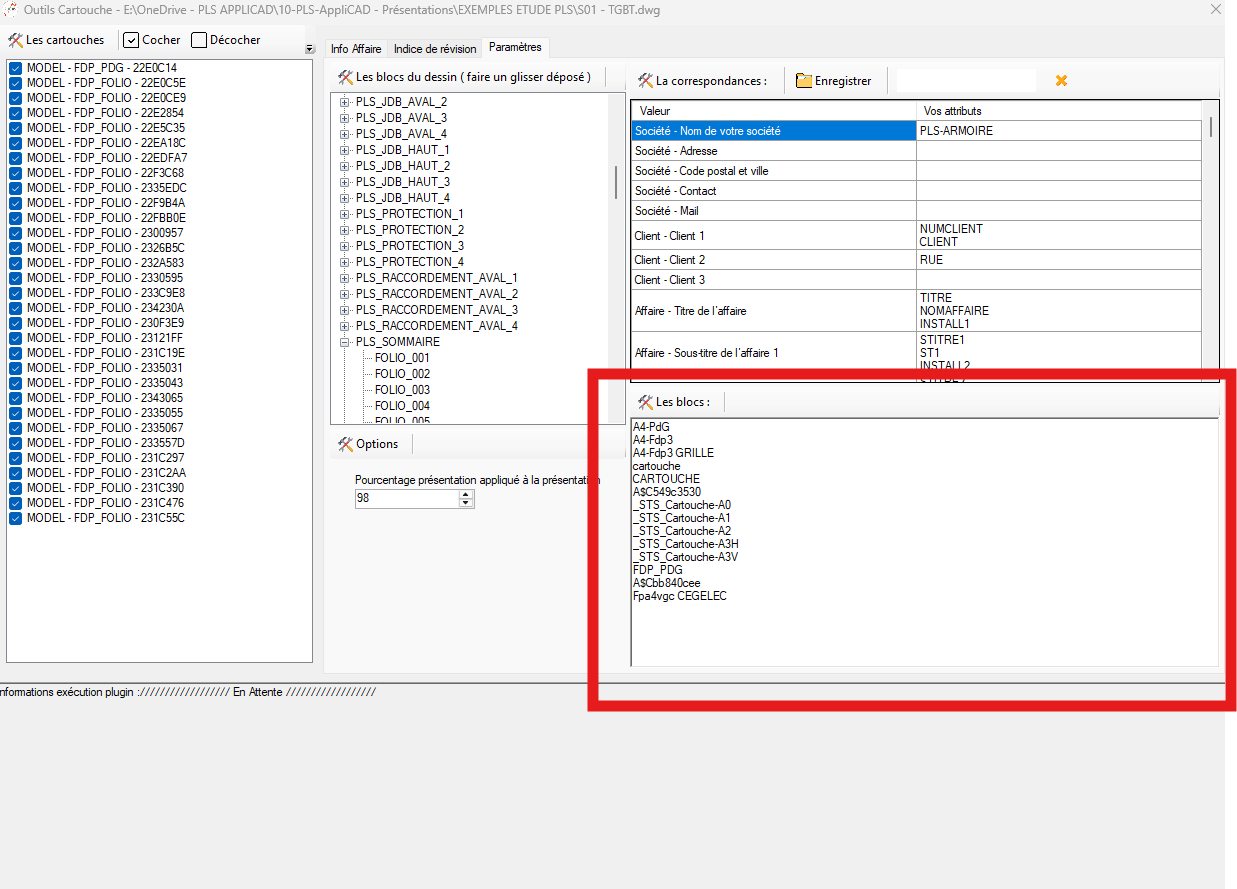
The “Blocks” table lists the blocks that will be processed.
Blocks not in this list will not be modified
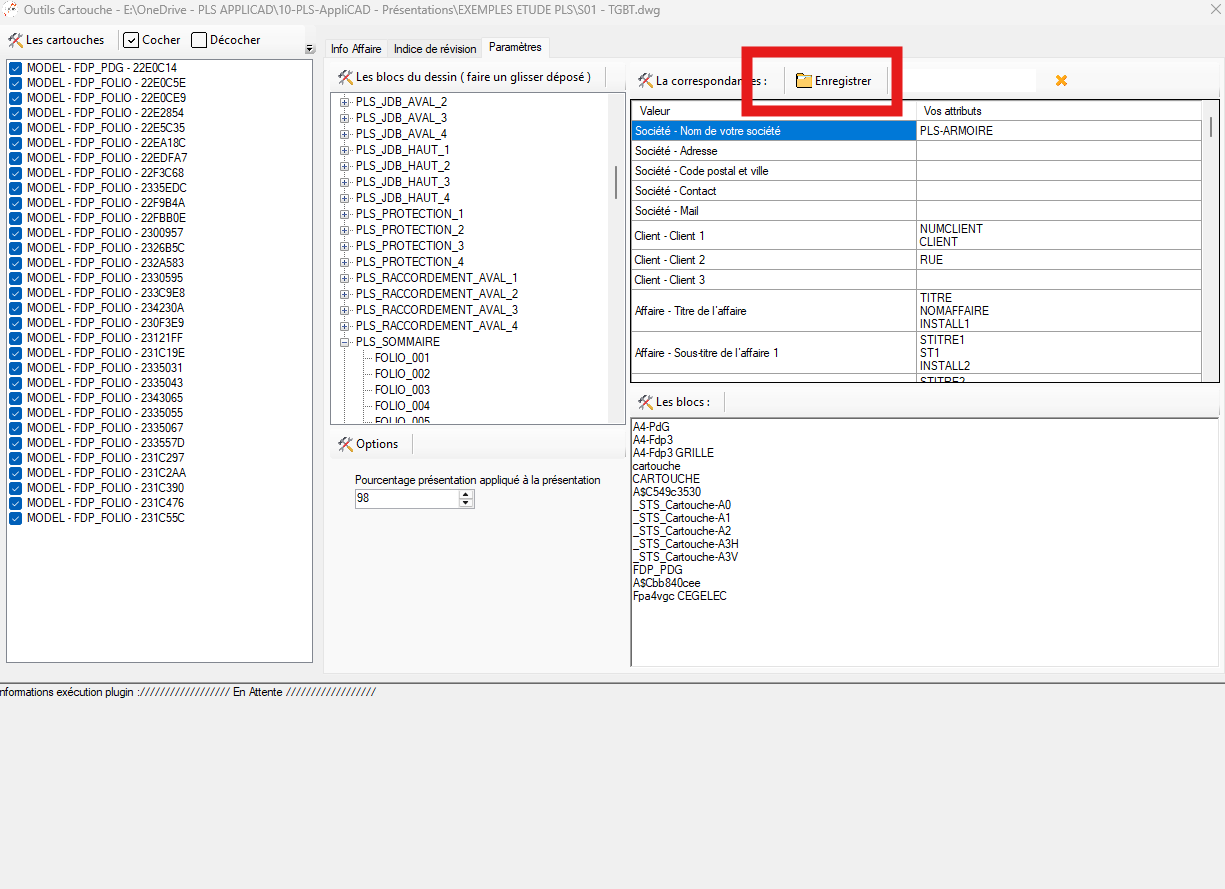
and will not be treated as title blocks.Only listed blocks will be modified. “Save” button (Settings)
Saves your attribute ↔ field mappings.
These settings will be automatically reloaded when opening the form.
You only need to do this once.Your mappings are kept for the next project. Options → Layout percentage
Sets the framing when automatically creating layouts.
Example: 98% leaves a small margin around the title block.Zoom setting to generate layouts automatically. Greyed fields = attribute not found
If a field is greyed out, it means the corresponding attribute does not exist
in the checked title blocks.
To enable it, add the correct attribute mapping in the “Settings” tab.A greyed field = no attribute found in your title blocks. Saving the output DWG
When you close the form:
if changes were written into attributes, the tool prompts you
to save the DWG.
If you decline, unsaved changes will be lost.Your choice: save or discard the changes.